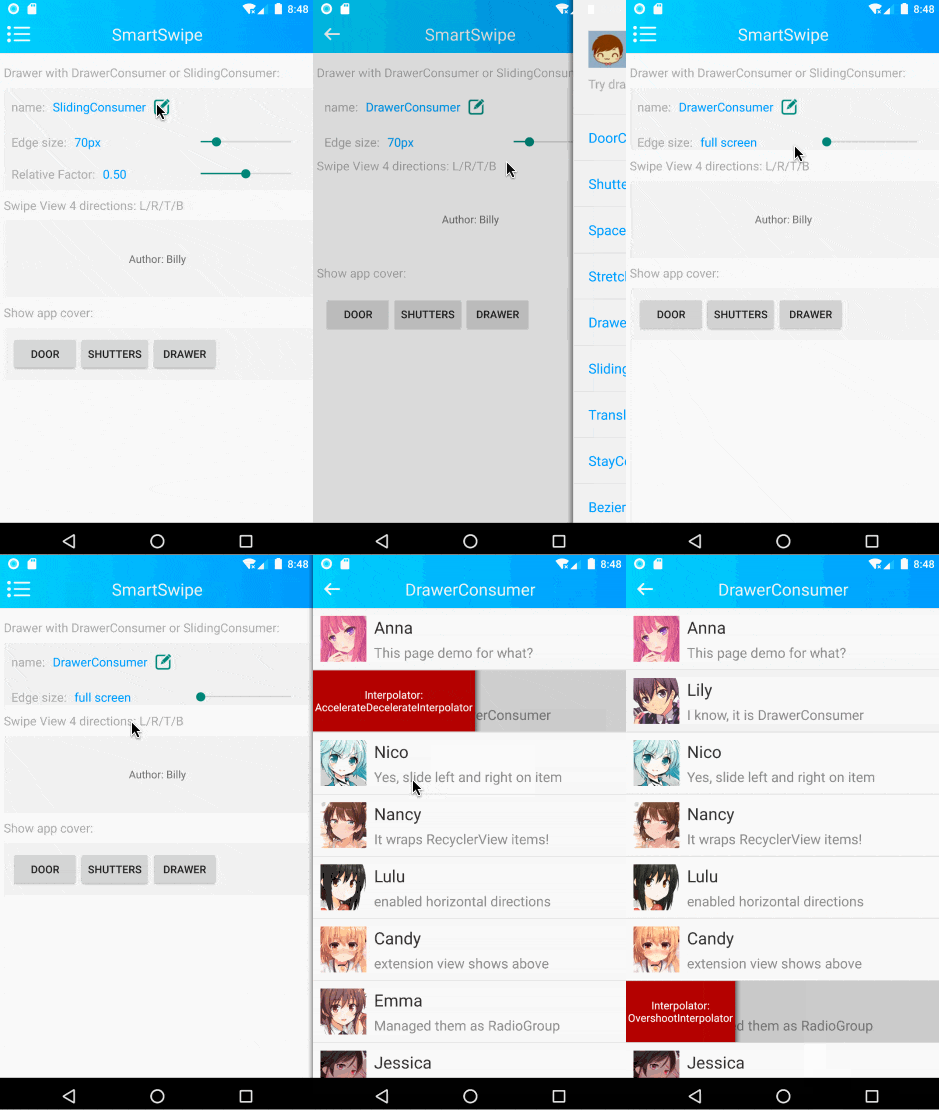
DrawerConsumer
抽屉效果,抽屉显示在被包裹的控件上层(即覆盖在contentView之上显示),如下图所示:
示例代码
SmartSwipe.wrap(view)
    .addConsumer(new DrawerConsumer())    //抽屉效果
    .setHorizontalDrawerView(buttonsViewGroup) //设置横向(左右两侧)的抽屉为同一个view(常见的侧滑显示删除按钮的功能)
    .setScrimColor(0x2F000000) //设置遮罩的颜色
    .setShadowColor(0x80000000)    //设置边缘的阴影颜色
    ;
设置抽屉View
为某个方向设置抽屉view的同时,如果view不为null,则自动enable当前consumer的该方向;否则,如果view为null,则自动disable当前consumer的该方向
| 方法名称 | 参数 | 备注 |
|---|---|---|
| setDrawerView | int direction View view |
将view设置为指定方向上的抽屉,并将direction方向enable设置为(view != null) |
| setLeftDrawerView | View view | 将View设置为左侧抽屉,并将左侧的enable设置为(view != null) |
| setRightDrawerView | View view | 将View设置为右侧抽屉,并将右侧的enable设置为(view != null) |
| setTopDrawerView | View view | 将View设置为上侧抽屉,并将上侧的enable设置为(view != null) |
| setBottomDrawerView | View view | 将View设置为下侧抽屉,并将下侧的enable设置为(view != null) |
| setHorizontalDrawerView | View view | 将View设置为左右两侧的抽屉,并将左右两侧的enable设置为(view != null) |
| setVerticalDrawerView | View view | 将View设置为上下两侧的抽屉,并将上下两侧的enable设置为(view != null) |
| setAllDirectionDrawerView | View view | 将View设置为上下左右4侧抽屉,并将上下左右4侧的enable设置为(view != null) |
除了通过代码设置抽屉View之外,还可以在xml布局文件中设置,例如demo首页的侧滑点赞控件:
<com.billy.android.swipe.SmartSwipeWrapper
    android:id="@+id/main_ui_wrap_view"
    android:layout_width="match_parent"
    android:layout_height="100dp"
    android:background="@drawable/menu_item_bg"
    >
    <!-- 左右两侧的抽屉 -->
    <LinearLayout app:swipe_gravity="right|left" android:orientation="horizontal" android:layout_width="wrap_content" android:layout_height="match_parent">
        <com.like.LikeButton
                app:icon_type="heart"
                app:icon_size="25dp"
                android:id="@+id/star_button"
                android:layout_width="wrap_content"
                android:layout_height="match_parent" android:background="#15BABA"/>
        <com.like.LikeButton
                app:icon_type="Star"
                app:icon_size="25dp"
                android:id="@+id/like_button"
                android:layout_width="wrap_content"
                android:layout_height="match_parent" android:background="#CBECCC"/>
    </LinearLayout>
    <!-- 主体控件 contentView -->
    <TextView android:background="#f2f2f2"
              android:layout_height="match_parent"
              android:layout_width="match_parent"
              android:gravity="center"
              android:text="@string/demo_main_author" />
    <!-- 上侧抽屉 -->
    <com.like.LikeButton
            app:icon_type="heart"
            app:icon_size="25dp"
            app:swipe_gravity="top"
            android:layout_width="wrap_content"
            android:layout_height="match_parent" android:background="#15BABA"/>
    <!-- 下侧抽屉 -->
    <com.like.LikeButton
            app:icon_type="Thumb"
            app:icon_size="25dp"
            app:swipe_gravity="bottom"
            android:layout_width="wrap_content"
            android:layout_height="match_parent" android:background="#CBECCC"/>
</com.billy.android.swipe.SmartSwipeWrapper>
注意:
- SmartSwipeWrapper的子view中,第1个不含
app:swipe_gravity属性的控件作为被wrap的主体contentView - 其它view需要设置
app:swipe_gravity才有效app:swipe_gravity="top"表示作为上侧抽屉app:swipe_gravity="right|left"表示作为上下两侧的抽屉- 其它设置方式同理可知
- 最后,别忘了通过
findViewById(R.id.main_ui_wrap_view).addConsumer(xxx)设置consumer- 支持
DrawerConsumer、SlidingConsumer
- 支持
属性列表
继承自 SwipeConsumer,公共属性中的参数设置尽皆有效
getter/setter都一一对应,不赘述
| 变量名称 | 类型 | 取值范围 | 默认值 | 备注 |
|---|---|---|---|---|
| mScrimColor | int | 颜色值 | 0 | 遮罩玻璃颜色色值,如果为0,则不显示遮罩 |
| mShadowColor | int | 颜色值 | 0 | 边缘阴影颜色色值,如果为0,则不显示边缘阴影 |
| mShadowSize | int | >=0 | 10dp | 边缘阴影的尺寸,如果为0,则不显示边缘阴影 |
| mShowScrimAndShadowOutsideContentView | boolean | ture/false | false | 遮罩和边缘阴影显示在contentView的外侧 |
